We often compare layers or maps visually to understand differences and gain insight. ArcGIS Online offers many ways to create or use apps that enable you to swipe or compare them. Here’s a compilation of current options, with examples.
Quick Links
Use the links below to jump to topics of interest.
Configurable apps
App builders
Specialty apps
Stories
Classic Stories
Media Map
Media Map is intended for anyone that wants to display an interactive map with basic tools and map navigation. It’s a compact, simple, and useful configurable app. Media Map supports both express and full setup modes.
Configure the app
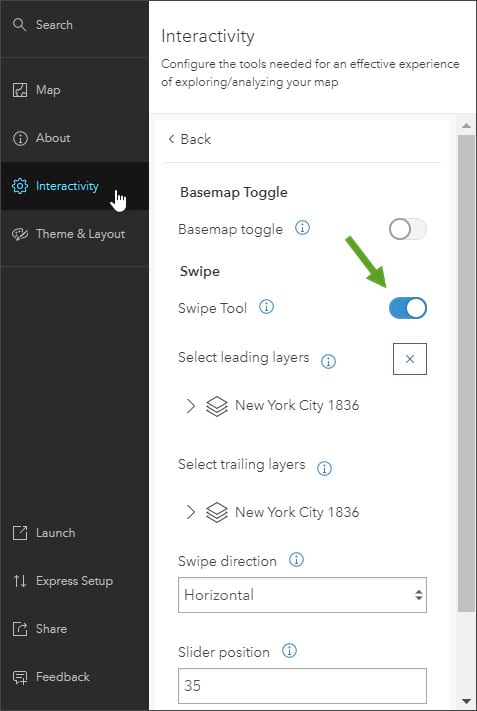
Media Map includes a swipe tool that can be configured when in full setup mode. In the Interactivity section, toggle the Swipe Tool on and select the leading and trailing layers. You can also configure the swipe direction and position.
Use the app
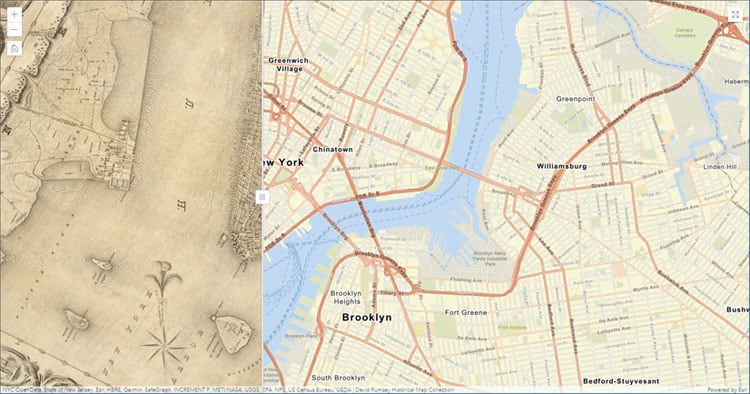
Open the app below, then click and hold the swipe slider to move it.
This second Media Map swipe example adds configuration options to toggle layer visibility across multiple layers, an information panel, and a fullscreen button.
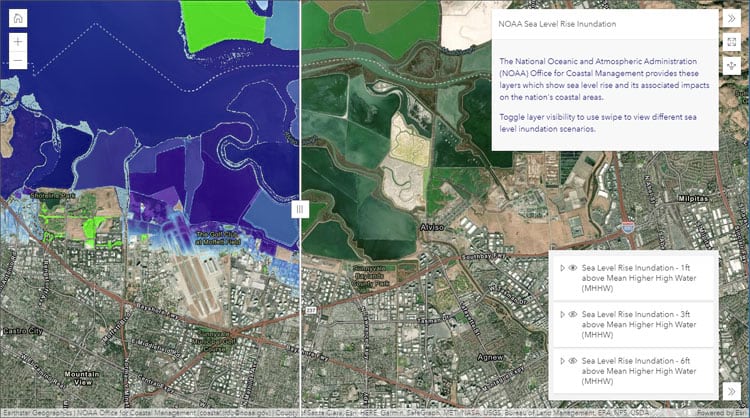
View the first sample map and second sample map used in the apps. For more information, see Use swipe in Media Map.
Compare
Compare is a configurable app template that supports the a side-by-side or stacked comparison of two maps or scenes. It can be configured to compare two scenes, two maps, or one of each. The two views can be linked or unlinked depending on whether you want to view the same location.
Configure the app
In the General tab, select the maps or scenes you want to compare.
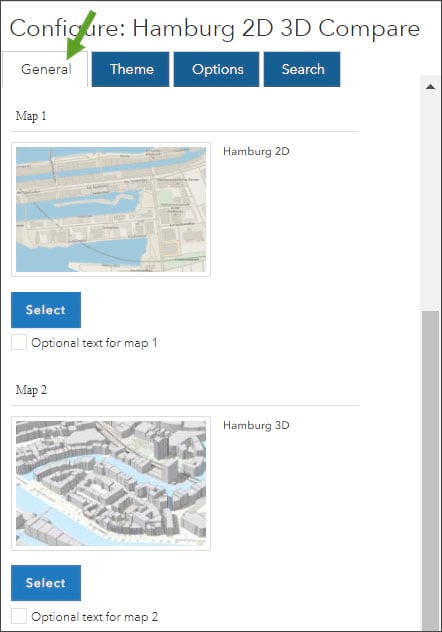
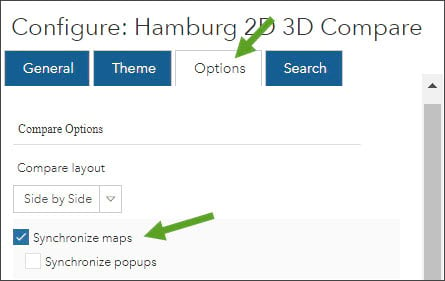
Open the Options tab to synchronize the maps. You can also change the layout from Side by Side to Stacked, add an expand button, include a basemap toggle for maps, and more.
Use the app
Open the app below, which uses both a 2D and 3D map. Pan, zoom, or tilt to compare the two, or click and hold the comparison slider to change your map focus.
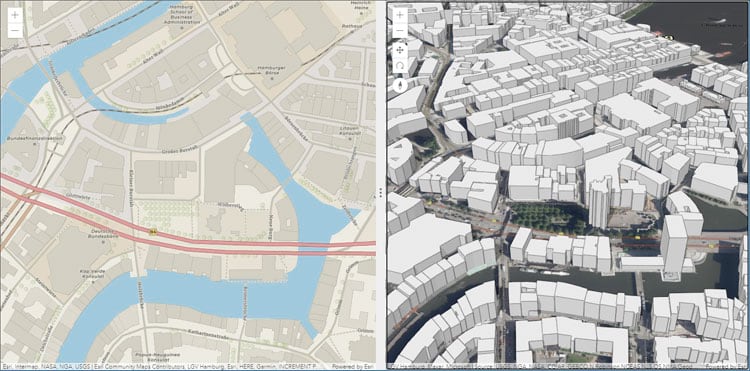
View the sample 2D map and sample 3D map used in the application. For more information, view the Compare app item overview.
Imagery Viewer
Imagery Viewer is a configurable app template for visualizing and exploring imagery through time and space, and includes tools for navigating through time, recording locations, measurement, and more. A one-image configuration lets users focus on a single imagery layer, while a two-image configuration lets users compare two imagery layers using a swipe tool.
Configure the app
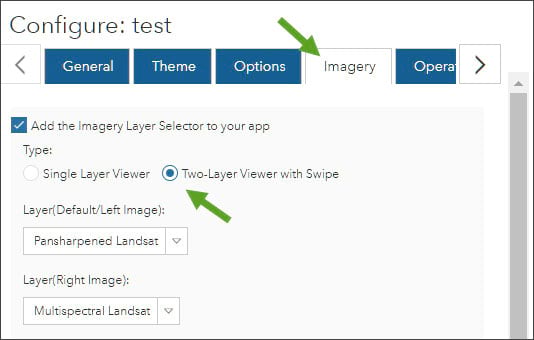
In the Imagery tab, ensure that the imagery layer selector is toggled on, then click Two-layer viewer with swipe. You can also set the default imagery layers for the left and right side of the swipe.
Use the app
Click the Layer Selector in the upper left corner of the app. Click left and right image to select the imagery layer to display on that side. Note that the default layers for the left and right sides have already been configured.
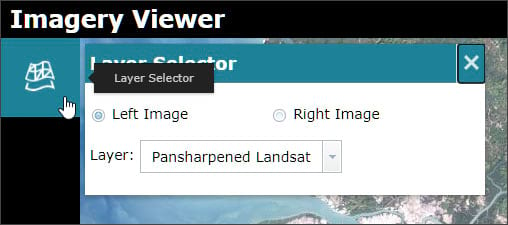
Open the app below.
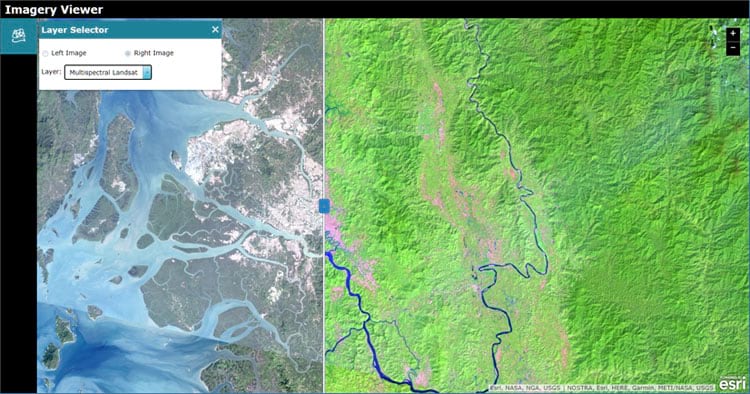
View the sample map used in the app. For more information, see the Imagery Viewer item overview.
Web AppBuilder
ArcGIS Web AppBuilder is a WYSIWYG app builder that lets you build 2D and 3D web apps, no coding required. Start by choosing a layout, then add configurable widgets to create your app.
Configure the app
Web AppBuilder includes a swipe widget that can be found in the widget library. Start by choosing a theme, style, and layout. Then add the swipe widget from the widget gallery.
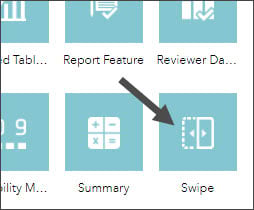
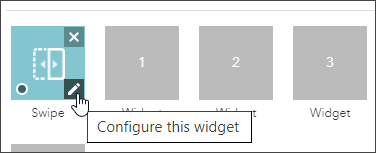
Once added to a toolbar, click the dot in the lower left to automatically enable the widget when the app is opened, then click the pencil to open the configuration panel.
The widget can be configured in a variety of ways. You can choose vertical, horizontal, or spyglass swipe mode, and can set the direction, color, and which layer in your map to swipe. Below is shown the configuration used in the sample app.
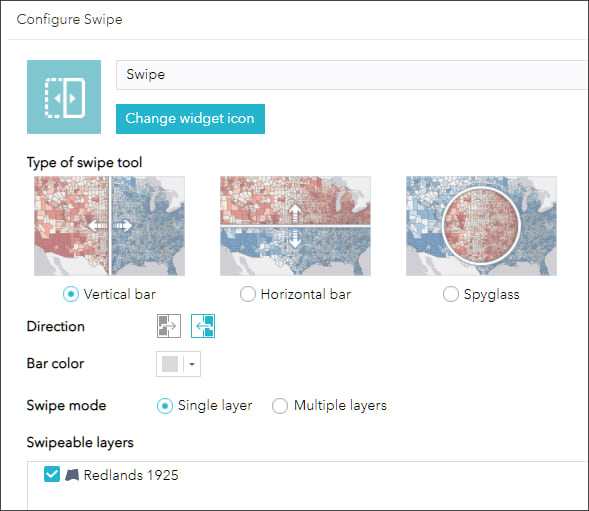
Use the app
Since the app is configured with the swipe tool enabled and desired layer already set, all you need to do is grab the handle and swipe.
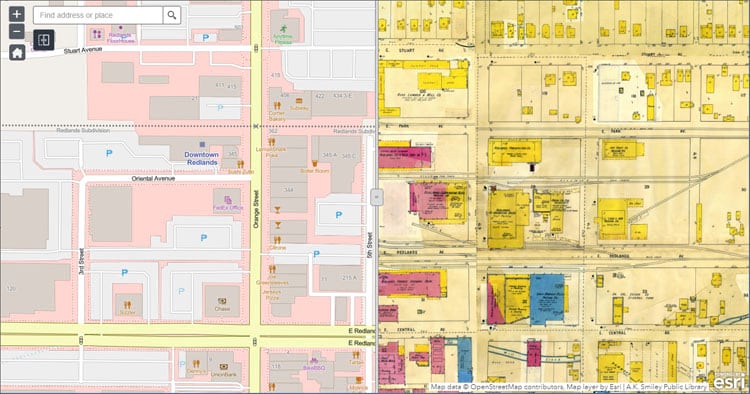
View the sample map used in the app. For more information, see Swipe widget.
ArcGIS Experience Builder
ArcGIS Experience Builder lets you deliver responsive web experiences without writing any code. You can create apps and/or pages that contain 2D and 3D maps, text, and media. Experiences can focus on one type of content or can combine and link many types of content to create a complete experience and destination for your audience. Experience Builder can be used to build experiences that contain multiple maps, 2D or 3D, that can be synced.
Build the experience
To link two or more maps or scenes, use triggers and actions. Widget actions are in response to linked trigger actions in other widgets. Select a widget and open the Action tab to add a trigger, then specify the target and action. To sync two maps or scenes, apply the trigger and action in reverse. See Add action triggers to widgets for more information.
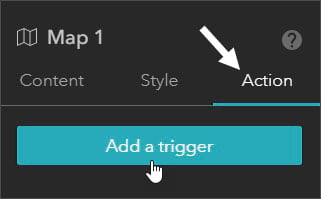
Use the experience
Experience Builder provides lots of flexibility in creating the experience you want, so there is no specific way that comparison apps will work; it depends on how you build it. In the example below, a 2D map and 3D Scene have been synced using triggers and actions. Pan, zoom, or tilt to compare the two.
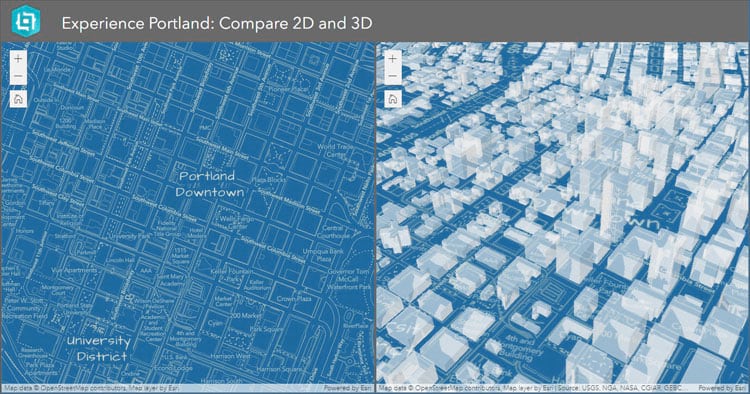
View the 2d map and 3d scene used in the experience. For more information, see Get started with ArcGIS Experience Builder: sync 2D and 3D maps.
World Imagery Wayback
While you can’t use the Wayback app to swipe your own layers, it can be used against any layers in the Wayback Imagery archive. Wayback Imagery is a digital archive of the World Imagery basemap that enables you to access 100 versions of world imagery captured over the past 6 years. The World Imagery Wayback app is the best way to browse these archived versions and includes a swipe mode to compare versions.
Use Wayback swipe
Open the Wayback app, zoom to an area of interest, and enable the swipe tool. Available layers will be shown on the left and right. Turn on the desired layers by clicking them in the left and right columns, then use the swipe tool to compare.
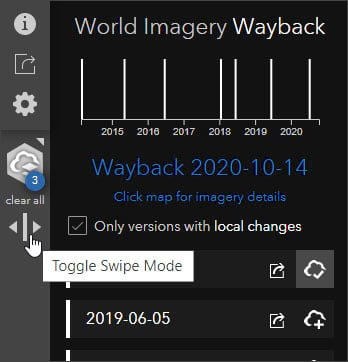
Use the app
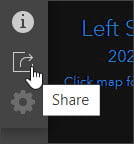
A handy feature of the Wayback app is that you can share the current swipe settings, including the selected imagery and map extent, by clicking the share button in the upper left.
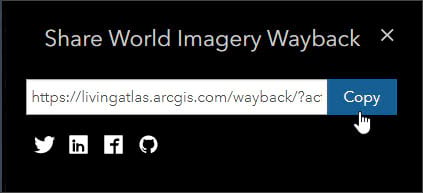
Copy the URL to share with others.
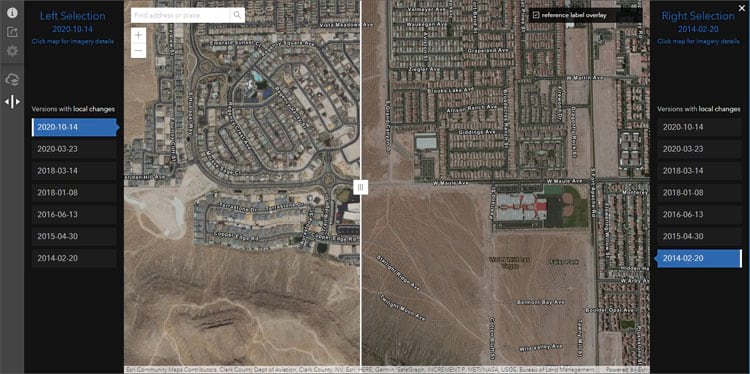
Click the map below to view a shared Wayback swipe comparison of 2014 and 2020 imagery showing development over time in the Las Vegas, Nevada, area.
For more information, see Use World Imagery Wayback.
Sentinel Explorer
Using Sentinel Explorer, you can apply a variety of tools against Sentinel-2 imagery, accessed directly from the Sentinel-2 collection on Amazon Web Services (AWS) and updated daily. Sentinel-2, 10, 20, and 60m multispectral, multitemporal, 13-band imagery is rendered on-the-fly and available for visualization and analytics via the app.
Use Sentinel Explorer swipe
Sentinel Explorer includes a swipe tool which can be used to compare Sentinel imagery against the basemap, or imagery from different dates and different renderers. Open Sentinel Explorer and sign in to your account.
To use the swipe, navigate to your area of interest and render the imagery as desired. Then follow these steps:
Step 1 — Open the time selector to choose a date and add the layer to the swipe by clicking Set current as secondary layer. The secondary layer will appear on the left when you open the swipe tool with the current renderer.
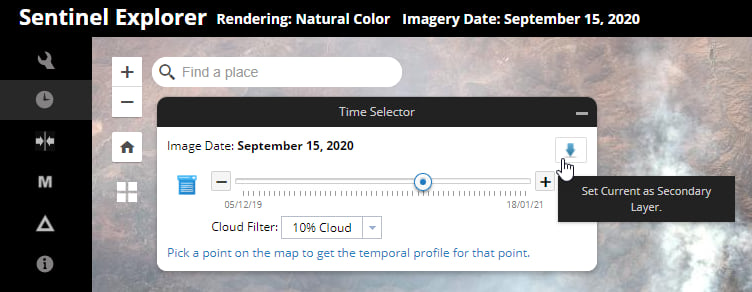
Step 2 — Move the time selector to a different date. You can also change the renderer.
Step 3 — Dismiss the time selector and click the swipe tool to interactively compare the two dates of imagery. The chosen dates appear at the top of the application.
Tip: Click the App Tutorial tool and select Time, Swipe, and Change from the dropdown list to review the steps above and learn more.
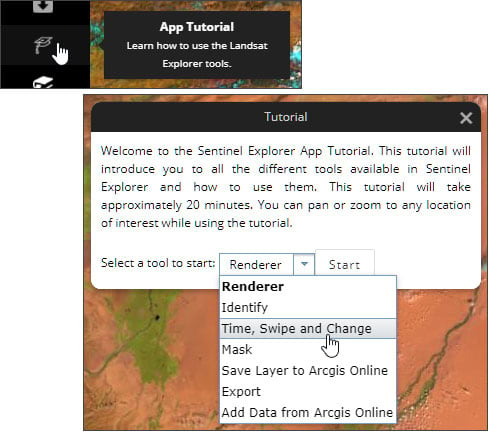
Use Sentinel Explorer
Open the app below to begin exploring Sentinel imagery. Begin by exploring the dynamic renderers that can be applied, then use swipe to compare imagery. Use the tutorial to learn about using masks, change detection, and other available tools.
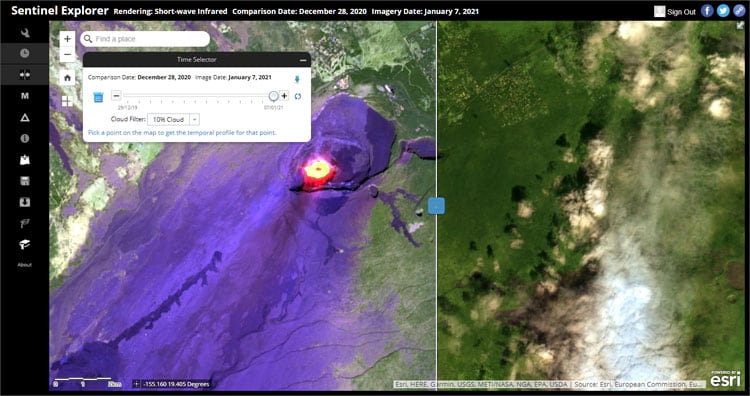
For more information, see the Sentinel Explorer item overview.
Landsat Explorer
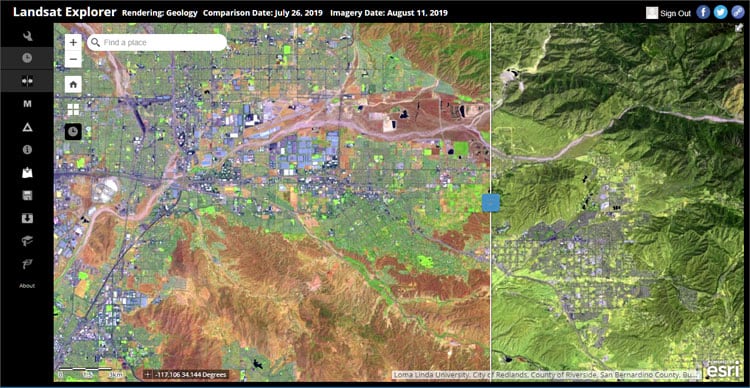
Landsat Explorer lets you apply a variety of tools against Landsat imagery, accessed directly from the Landsat collection on Amazon Web Services (AWS) that is updated daily. The imagery is rendered on-the-fly and available for visualization and analytics via the app.
Use this app to explore the planet’s geology, vegetation, agriculture, and cities. Additionally, access the entire Landsat archive to visualize how the Earth’s surface has changed over the last forty years.
Use Landsat Explorer swipe
Landsat Explorer includes a swipe tool which can be used to compare Landsat imagery against the basemap, or imagery from different dates and different renderers. Open Landsat Explorer and sign in to your account.
To use swipe, navigate to your area of interest and render the imagery as desired. Then follow these steps:
Step 1 — Open the time selector to choose a date and add the layer to the swipe by clicking Set current as secondary layer. The secondary layer will appear on the left when you open the swipe tool with the current renderer.
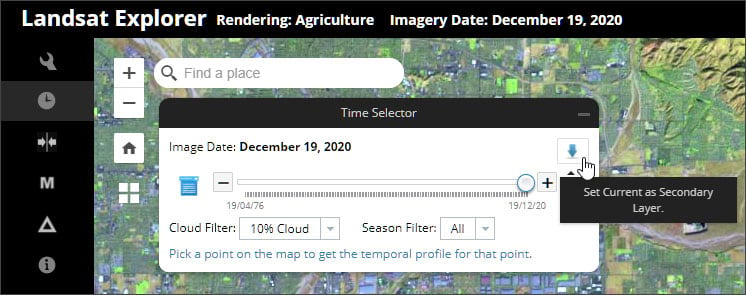
Step 2 — Move the time selector to a different date. You can also change the renderer.
Step 3 — Dismiss the time selector and click the swipe tool to interactively compare the two dates of imagery. The chosen dates appear at the top of the application.
Tip: Click the App Tutorial tool and select Time, Swipe, and Change from the dropdown list to review the steps above and learn more.
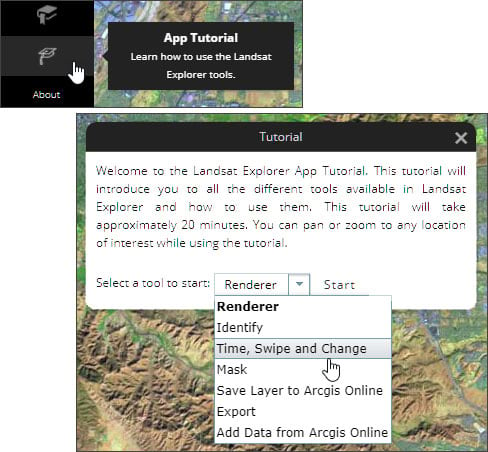
Use Landsat Explorer
Open the app below to begin exploring Landsat imagery. Begin by exploring the dynamic renderers that can be applied, then use swipe to compare imagery, and use the tutorial to learn about masking and other available tools.
Story Map Swipe & Spyglass
Story Map Swipe & Spyglass is one of the classic story map apps found in the Create a web app gallery. Story authors are encouraged to use the new ArcGIS StoryMaps to create stories. However, Esri will continue to maintain the classic templates for your use. For more information, see the Product road map.
Build a Swipe & Spyglass
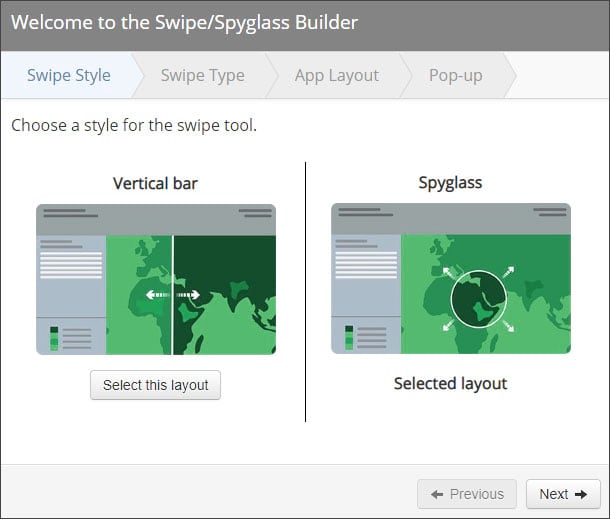
Using Story Map Swipe & Spyglass you can swipe two layers or two web maps. A builder guides you through the configuration experience, enabling you to choose the swipe style (vertical or spyglass), layers or maps to swipe, layout, and pop-up appearance.
Use the story
Depending on how the story map has been configured, the swipe uses either a vertical bar or a spyglass. The builder offers a variety of different settings to set the title and subtitle, the app logo, social links, and more. The example below uses a spyglass with minimal other options.
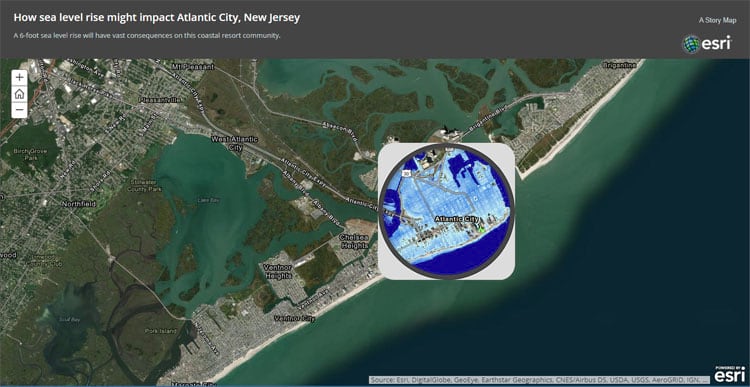
View the map used in the story. For more information, see Story Map Swipe & Spyglass Overview.
Story Map Series
Story Map Series is one of the classic story map apps found in the Create a web app gallery. Story authors are encouraged to use the new ArcGIS StoryMaps to create their stories, however Esri will continue to maintain the classic templates for your use. For more information, see the Product road map.
Build a Story Map Series
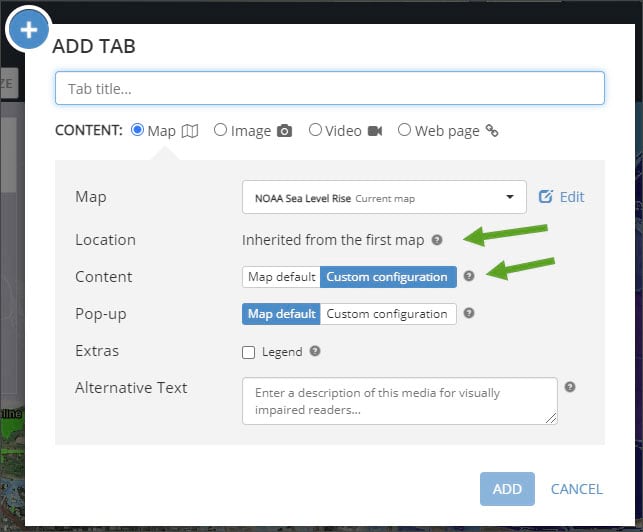
Using Story Map Series you can present a series of maps that viewers can easily browse and switch between using tabs, numbered bullets, or a side accordion layout. With the proper configuration a Series is useful to present and compare multiple layers or web maps.
A builder guides you through the configuration experience, enabling you to choose the layout and how the maps or layers are presented. The tabbed layout is especially useful for comparisons, though any layout works well. As you add maps to the story, use Location and to sync the map extent and
Use the story
The Story Map Series shown below uses the tabbed layout and a single map. The map location is synced across the tabs and individual layers are toggled on or off to show the progression of 1, 3, and 6-foot sea level rise scenarios.
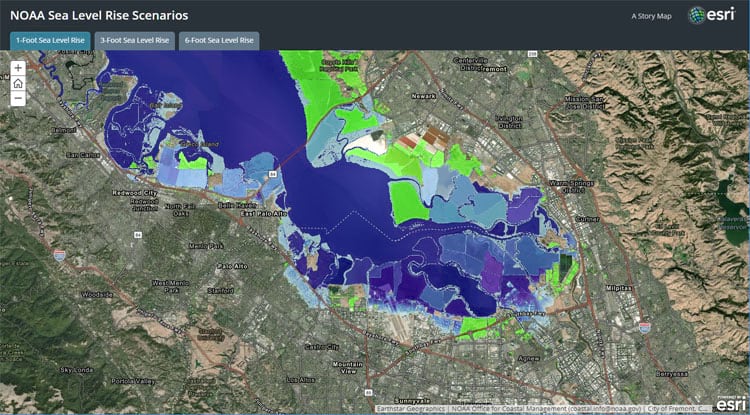
View the map used in the story. For more information, see Story Map Series Overview.
ArcGIS StoryMaps
ArcGIS StoryMaps make it easy to create inspiring, immersive stories by combining text, interactive maps, and other multimedia content. A story is authored using a builder that let’s you add blocks to your story to include text, maps, video, and more.
Using StoryMaps swipe
Swipe is one of the blocks that you can add to any story that lets you compare two maps, or two images.
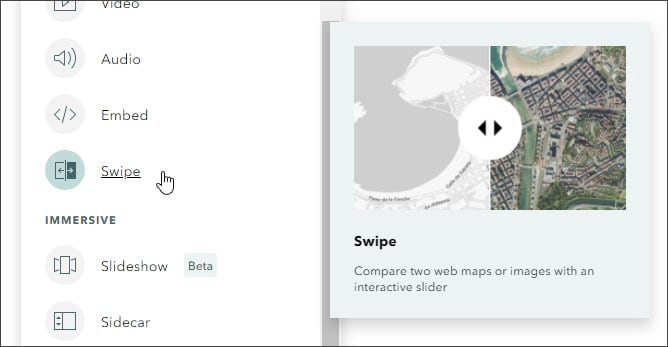
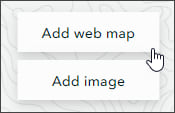
After you add the swipe block, choose Map.
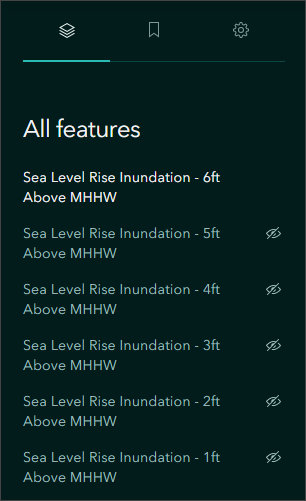
You can choose different maps for the left and right side of the swipe, or can choose the same map and toggle layer visibility on the left and right side to compare layers.
Use the story
The sample story below uses a swipe block to compare 1-foot and 6-foot sea level rise scenarios. The same map is used on either side of the swipe, but layer visibility is toggled to show the 1-foot scenario on the left and the 6-foot scenario on the right.
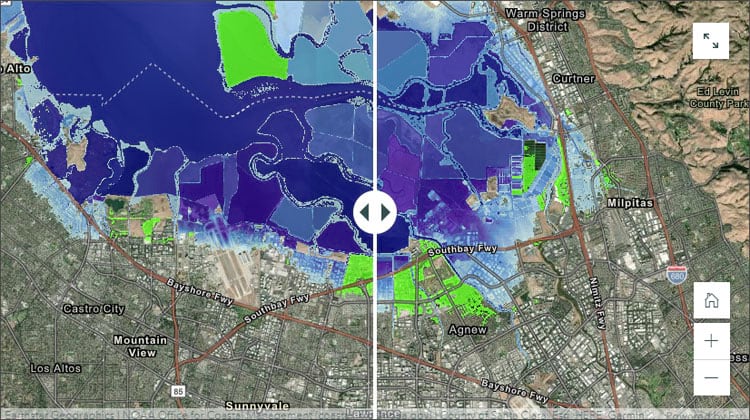
View the map used in the story. For more information, see ArcGIS StoryMaps Overview and Resources.
Summary
ArcGIS Online offers many ways to create or use apps that enable you to swipe or compare layers and maps. The above list is not entirely exhaustive, but offers a variety of ways to enable visual comparison of your GIS content.
"use" - Google News
January 26, 2021 at 08:40AM
https://ift.tt/3qJyuaS
Apps you can use to swipe and compare - esri.com
"use" - Google News
https://ift.tt/2P05tHQ
https://ift.tt/2YCP29R
Bagikan Berita Ini


0 Response to "Apps you can use to swipe and compare - esri.com"
Post a Comment